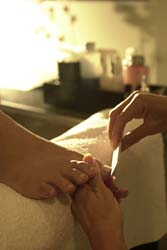
Since I wrote about manicures yesterday, I thought it would be a good idea to follow up with something about pedicures…mainly do-it-yourself pedicures. Unlike my hate for doing manicures, I actually love doing pedicures because I’m not so horrible at it. So here is the foolproof way to doing your own pedicure. Oh and you can refer back to my previous post to see all the tools you’ll be needing.
STEP 1: PREP
If your feet are dying for some extra TLC, you probably need a good soak. You can combat heavy wear and tear on your feet with weekly pedicures. Start by soaking your feet in warm water infused with essential oils or Dead Sea salts. Both of these will hydrate your skin and promote relaxation during that time.
STEP 2: SHAPE
Start off by trimming your nails with a large, straight nail clipper which will prevent ingrowns. When you cut in a rounded shape, ingrowns can occur during regrowth. File your nails and push back your cuticles with an orangewood stick. 
STEP 3: SMOOTH
Guard off all that dean skin with a coarse-grain exfoliator. For calluses, use a foot file to soften that hard skin. After rinsing, use a rich lotion to lock in the moisture. Avoid dry, cracked cuticles by using cuticle oil regularly. If you’re strapped for time and can’t use lotion, at least use the cuticle oil to soften your cuticles. Here’s a tip: if you don’t have cuticle oil, you can just as well use olive or almond oil.
STEP 4: POLISH
Make sure there is nothing left on the nail bed before applying your nail polish. If you must, use an acetone-free nail polish remover to remove any polish or dirt. Start with the basecoat to help prevent discoloring and then apply your nail polish followed by the topcoat. Wait at least half an hour to an hour before putting your shoes on! 